RStudio in the Cloud via Docker & AWS EC2
In today’s post I am going to go through the steps needed to get RStudio up-and-running in the cloud using Amazon’s free-tier EC2 services, Docker, and rocker/tidyverse (free-tier setups can still result in expenses so please read the documentation carefully!).
If you’ve never done anything with AWS before, the first thing you’ll need to do is create and activate an AWS account. After that, as long as you’ve got RStudio, Git BASH, and a Win 10 PC, the remainder of the instructions should work without issue. Keep in mind that this post doesn’t scratch the surface of AWS offerings so for additional information, an internet search engine will be your friend. AWS documentation changes often so I have found it helpful to limit searches to within a year to keep results relvant.
While there are a myriad of options to access compute-as-service platforms, this EC2/Docker route is a quick-&-scrappy way for a single user or small team to access RStudio, powered by a scalable infrastructure-as-a-service (IaaS) platform, from any internet-connected computer with a browser on the planet.
Create an EC2 Instance on AWS
Create a free-tier EC2 instance from your AWS console. You’ll first be asked to select an AMI. While you can select an AMI pre-built with RStudio, those can cost hundreds/thousands of dollars. If you’re just getting started with AWS services, this Docker route is free-to-very-low-cost - a good place to start if you’re just exploring.
Below, I select the free-tier, no-frills Amazon Linux 2 AMI
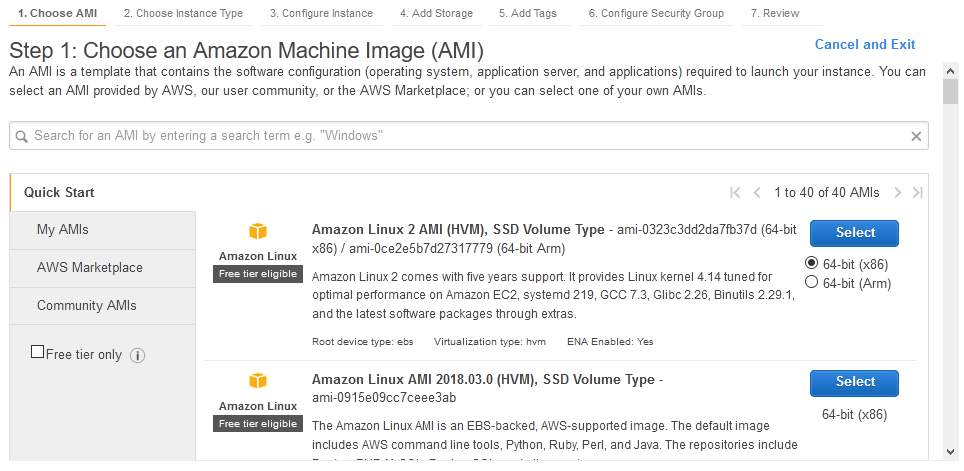
Amazon Linux 2 AMI, free tier at the time of this posting
There many hardware options to choose from but I went with t2.micro as it’s free:
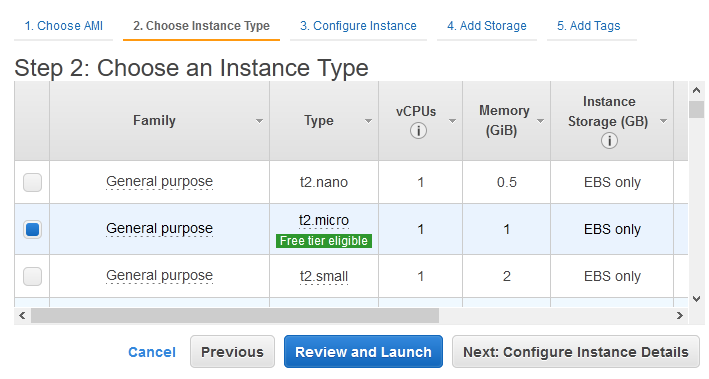
Other free-tier options are available.
For the purpose of this post, we’re going to leave the default configurations in place for steps 3 through 5 but for security configuration, you’re going to add Custom TCP Rule for port 8787. You will see warnings and while you can ignore them for now, you will need to consider them carefully if you ever plan on putting something into production for a client or employer:
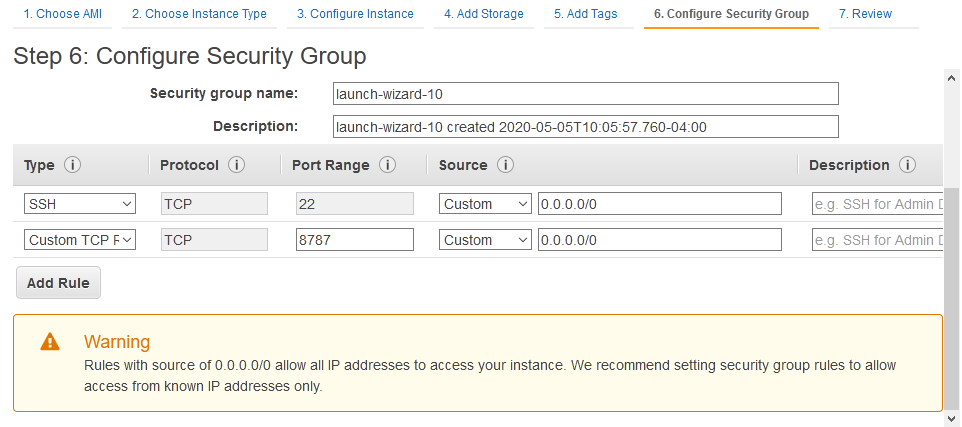
Ill-advised rules for port 8787
After launching, you’re going to be given an option to create a key pair for SSH’ing into your instance (we’re going to do that using Git BASH). In this example, I’ve called my .pem file jbNew2020.pem and saved it locally under Documents/Projects/aws:
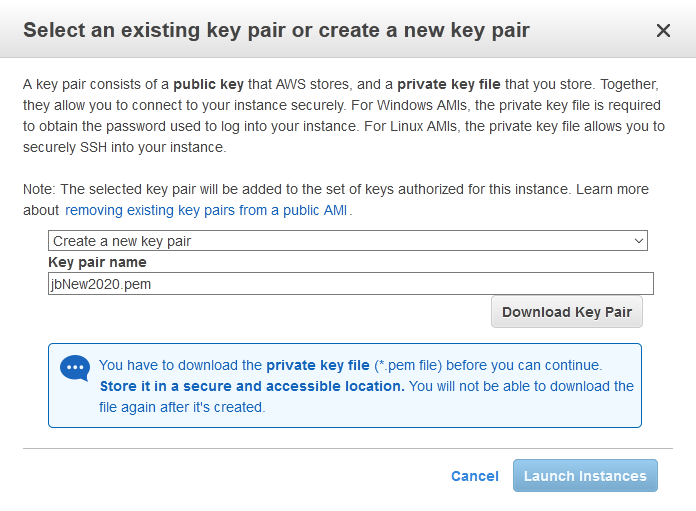
Be sure to remember where you save your .pem file!
Next, by navigating to the running instances in your AWS console, you’ll see your freshly-created EC2 instance initializing - please make a note of the IPv4 Public IP.

Once you’ve got the instance running, you’ll use the IPv4 IP to navigate to your instance from a browser.
SSH Into Your EC2 Instance
Once you’ve spun up your EC2 instance, SSH into it using Git BASH for Windows from your local PC. You can find the instructions for what to type into the command line from the AWS console - it’ll look like this:
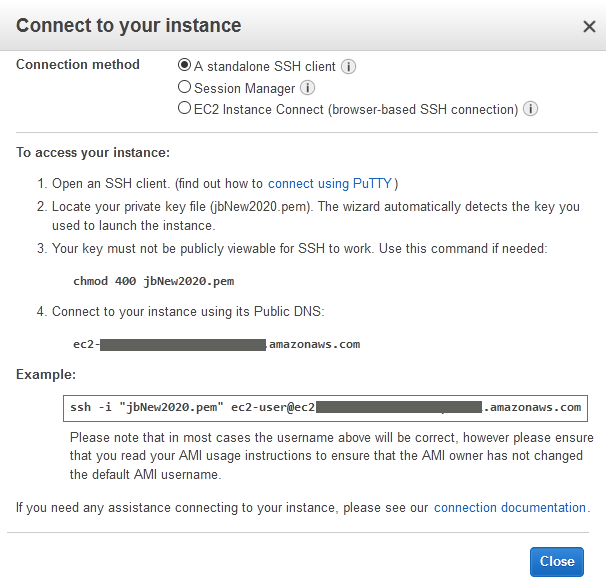
The red square encloses the part of the instructions to type into your Git BASH console
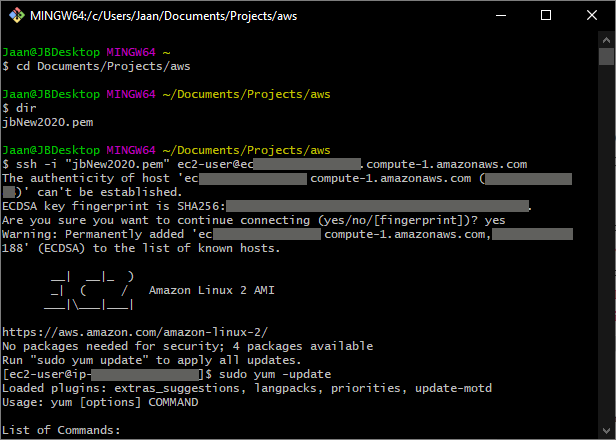
Launch the Git for Windows CLI and navigate to the folder where you saved your .pem file - recall that I saved mine under Documents/Projects/aws - and type in the code exactly as the AWS connections instructions state:
$ ssh -i "jbNew2020.pem" ec2-user@ec2-11-11-111-111.compute-1.amazonaws.comNote that I have replaced my values with 1’s for security purposes. Once pressing enter, you will receive a warning about connecting and it will ask you to confirm - type yes to continue:
Are you sure you want to continue connecting (yes/no/[fingerprint])? yesPrepare the EC2 Instance and Install Docker
Before you begin, you’ll need to update the baseline code on the instance via:
sudo yum -update
Here’s what my Git CLI session looked like after completing this step:
A bunch of updates will process but when that’s finished, you must install docker:
sudo yum install -y docker
After the download completes, you need to start the service - nothing will work unless you start docker first:
sudo service docker start

After starting docker on EC2 instance, you’ll get OK notices
Start RStudio in the Docker Container
Once those installs from the previous step are done, start RStudio by referencing the rocker/tidyverse repo. When you run the following docker command, you’re broadcasting to port 8787, setting a password for logging in from a browser, and downloading, installing, and starting rocker’s RStudio tidyverse version:
sudo docker run -d -p 8787:8787 -e PASSWORD="YourPWinQuotes" -e ROOT=TRUE rocker/tidyverseWhile you’re waiting for things to install you can note that there are several different rocker versions to choose from, each containing different libraries to suit a user’s needs. The standard rocker/rstudio is another option to consider if you’re not big on the tidyverse.
Log Into Cloud Instance of RStudio
From your local PC, open a browser, and type the previously noted IPv4 address into the address bar including port 8787. Your IP will be different, but from this post’s example, the URL to navigate to my cloud-based RStudio looks like:
12.456.78.901:8787 If you set up everything properly, you’ll be taken to this screen:
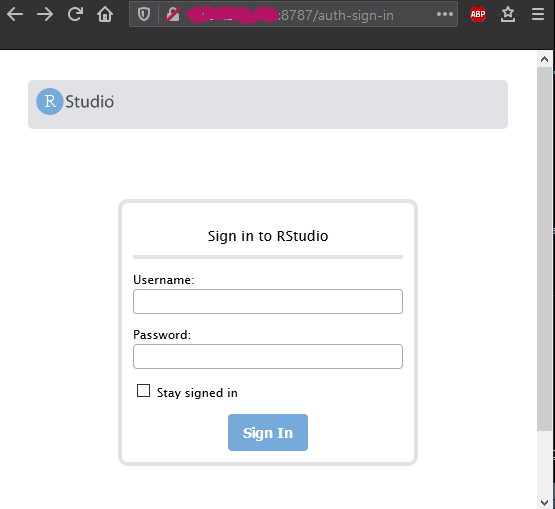
The RStudio browser-based login
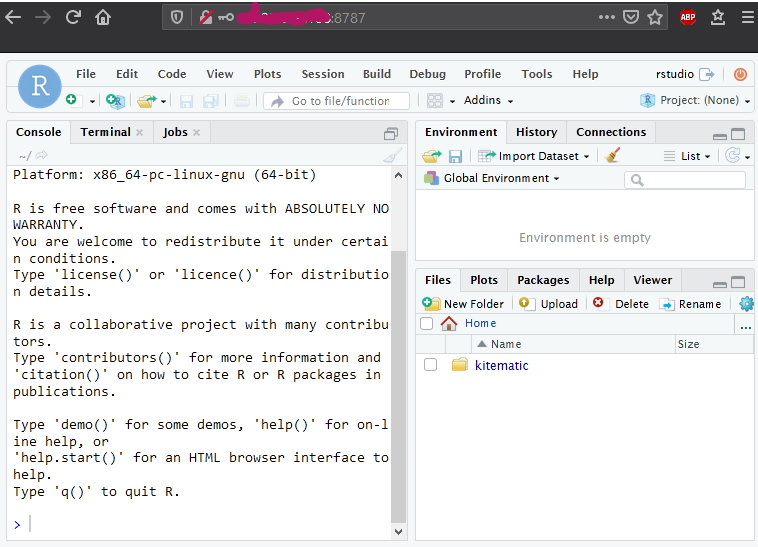
The default user is rstudio and the password, previously set up is YourPWinQuotes - entering in your credentials takes you to the goal of this post: RStudio up-and-running on your very own cloud instance!
Closing Thoughts
The technologies at play here are advanced but as data analytics professionals, if the tools, methods, or platforms are not easy to impliment or use, we may not add them to our daily work.
However, while it may not serve us to know the nitty-gritty details of how Docker, EC2, and all the rest of this stuff works, knowing how they’re used together to access scalable computing power certainly does.
As previously mentioned, there are tons of IaaS options out there so it can be difficult to decide which IaaS to go for. With Docker, regardless of which IaaS you choose, you’ll have the means to easily run RStudio on any of them.
If you’re very new to this topic, there’s a lot of information that I have glossed over so I have included a few resources in the references to get you started. Also, if the whole idea of Docker seems too intense, I’ve included reference to a pre-built RStudio AMI maintained by Louis Aslet - you can build your EC2 instance from one of these AMIs and skip Docker altogether - it’s got detailed video instructions, too!